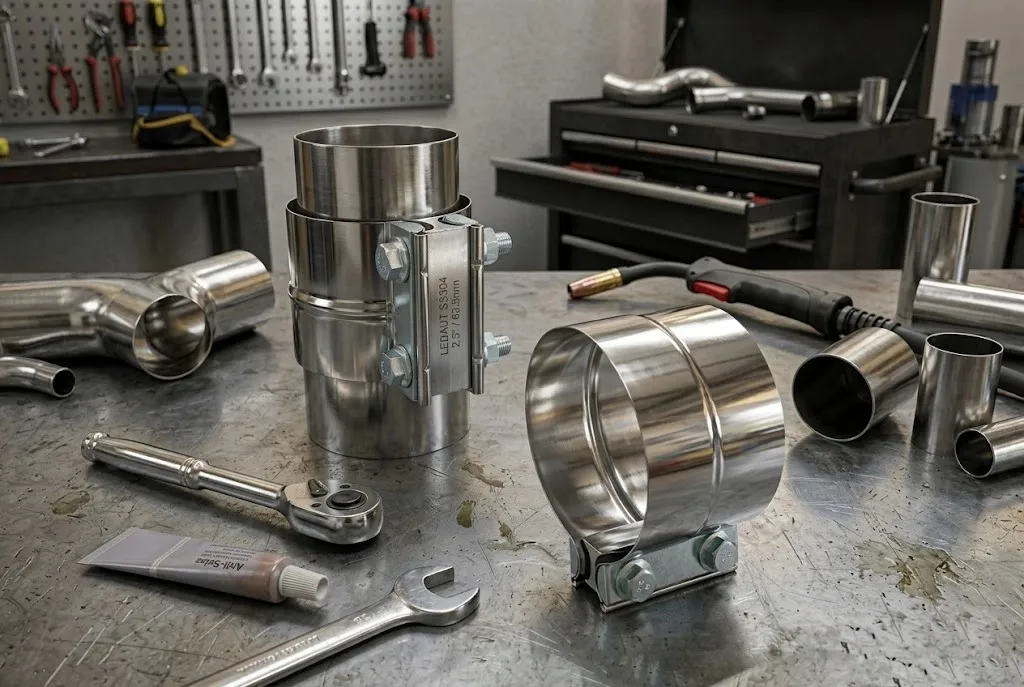
A clamp that is too tight crushes the pipe; one that is too loose lets the joint rattle and leak. Both show up as the same complaint at the counter — a noise or a smell the customer cannot place. This guide walks through the symptoms one by one, how tight an exhaust clamp should actually be, and how to tell a torque problem from a failing clamp.
Whether you’re a DIY home mechanic or a shop buying in bulk for your customers, understanding these five common problems — and knowing exactly how to fix each one — saves time, money, and comebacks. Here are the problems we hear about most, and what to do about each one.
Problem 1: Exhaust Clamp Leaking and Won’t Seal
Symptoms: Exhaust leak noise at the joint (a ticking or puffing sound that gets louder as the engine warms up), visible soot or carbon tracing around the clamp area, reduced engine performance, and sometimes a faint smell of exhaust entering the cabin at idle.
Likely cause: Wrong size. This is by far the most common problem — and the easiest to get wrong. The clamp diameter does not match the pipe outer diameter. If the clamp is too large, the band makes contact only at the top and bottom of the pipe circumference, leaving two open gaps on the sides. If too small, it simply won’t fit over the pipe at all.
A second, less obvious cause is pipe shape: some exhaust pipes are slightly oval instead of perfectly round, especially near bends or after welding. A clamp that fits a round pipe may still fail to seal on an oval section.
Fix: Measure the pipe outer diameter using a caliper (not a tape measure — calipers give you accuracy to 0.001 inch). Measure at two points: at the joint where the clamp will sit, and six inches away. If the two readings differ by more than 0.1 inch, the pipe is distorted and you may need a sleeve-type clamp instead of a band clamp.
Compare your measurement to the clamp’s rated size range. A 3-inch clamp on a 3.25-inch pipe will not seal no matter how tight you go. Always check the manufacturer’s spec sheet — some clamps claim a range (e.g., 2.5-3.0 inches) that allows for some tolerance. For best results, choose a clamp whose rated size matches your pipe OD within ±0.05 inches.
Tool checklist:
- Digital caliper (measures to 0.001 inch)
- Wire brush (clean pipe surface before measuring)
- Penetrating oil (if removing an old clamp first)
- Replacement gasket or sealant (optional, for lap joints)
Problem 2: Exhaust Clamp Rusting Too Quickly
Symptoms: Brown rust on the clamp surface within months of installation. Surface pitting that progresses to flaking in less than a year.
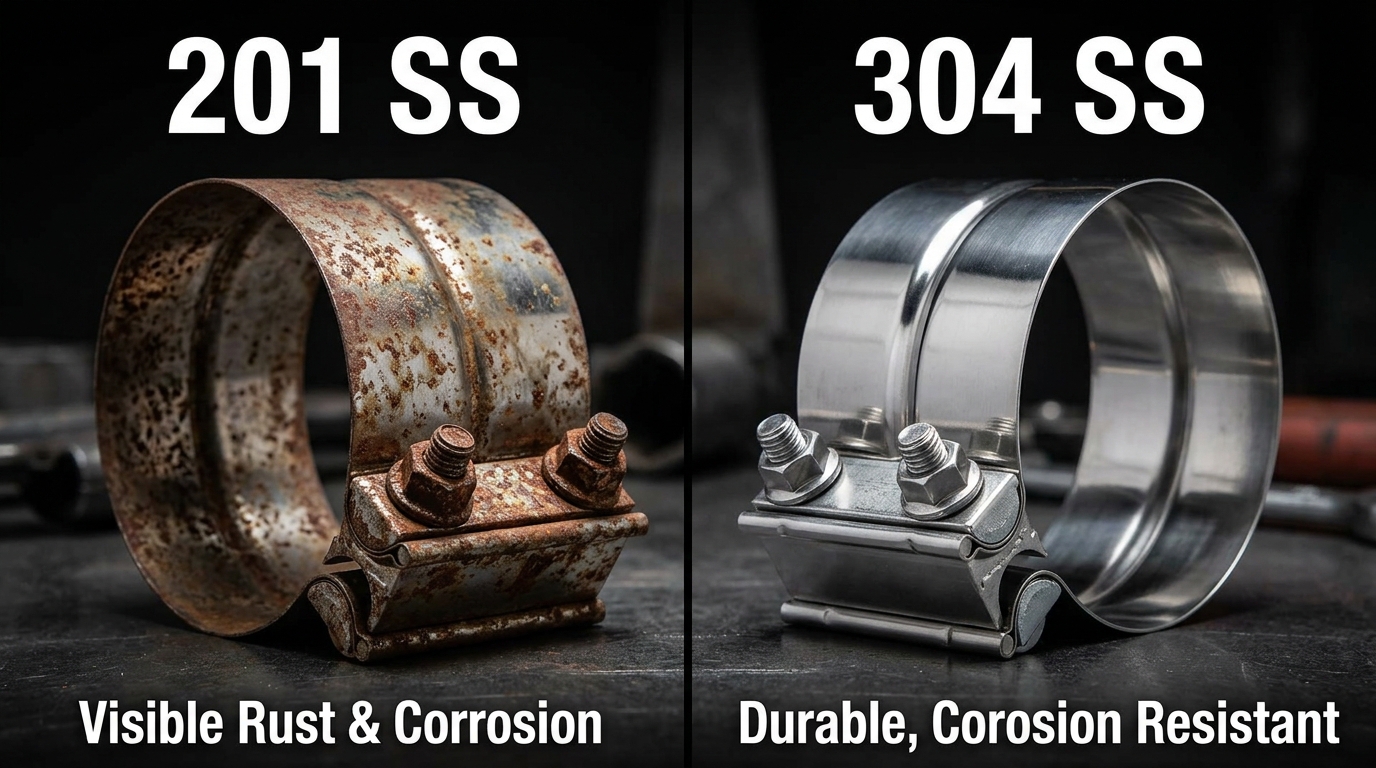
Likely cause: The clamp is made from low-grade stainless steel, zinc-plated carbon steel, or coated mild steel. Not all “stainless steel” is created equal — a clamp labeled “stainless” may contain as little as 12% chromium (SS201), which offers only marginal corrosion resistance.
Environmental factors accelerate this: road salt in winter climates, coastal salt air, frequent rain exposure, and condensation from short-trip driving all attack unprotected clamp materials. The underside of a vehicle is one of the most corrosive environments on the car — heat, moisture, road grime, and chemical residues combine to destroy cheap metal fast.
Fix: Upgrade to SS304 stainless steel clamps. Its 18% chromium and 8% nickel content provides genuine corrosion resistance that withstands the undercarriage environment. SS304 clamps can develop surface discoloration (a light brownish “tea stain” that is purely cosmetic) but will not rust through.
For extreme environments (coastal areas, heavy winter salt, farm vehicles), consider SS316 stainless steel, which adds molybdenum for chloride resistance. The extra cost is worth it when the alternative is replacing rusted clamps every 12-18 months.
Material comparison:
| Material | Chromium Content | Corrosion Resistance | Typical Lifespan (winter climate) | Cost Factor |
|---|---|---|---|---|
| Carbon steel (coated) | 0% | Low | 6-12 months | 1x |
| SS201 | 12-15% | Moderate | 1-2 years | 1.5x |
| SS304 | 18% | High | 5+ years | 2.5x |
| SS316 | 16-18% (+ Mo) | Very high | 10+ years | 4x |
Prevention tip: Apply a thin coat of anti-seize compound to the threads during installation. This prevents galvanic corrosion between the bolt and the clamp body, which is where many “rusted clamp” failures actually begin.
Problem 3: Exhaust Clamp Bolt Stripped or Over-Torqued
Symptoms: Bolt won’t tighten, spins freely but doesn’t compress the clamp, snaps during tightening, or the hex head rounds off when you try to turn it. The clamp feels tight but still leaks.
Likely cause: Over-torquing. Many people assume that tighter = better seal. This is false. Exhaust clamps seal through geometry, not brute force — the band wraps around the pipe and compresses it evenly. Once the band is in full contact, additional torque only stresses the bolt. Most exhaust clamp bolts are designed for 10-15 ft-lbs of torque maximum. A typical home mechanic can easily apply 30-40 ft-lbs with a standard ratchet.
Other causes include: using the wrong bolt material (zinc-plated mild steel bolt on a stainless clamp creates galling), cross-threading during installation, and reusing old bolts that have already been stressed.
Fix: If the bolt is stripped but hasn’t broken, replace it immediately. Do not reuse — a stressed bolt will fail at the worst possible moment. If the bolt has snapped inside the clamp body, you may need to drill it out or replace the entire clamp.
Always use a torque wrench if available. The correct procedure: hand-tighten until the band contacts the pipe surface fully all the way around, then give it another quarter-turn to half-turn — no more. If the clamp uses separate nut-and-bolt hardware (common on heavy-duty applications), apply nickel-based anti-seize compound to the threads before assembly to prevent galling between dissimilar metals.
Bolt torque reference (recommended):
- Band clamps (1.5-3.0 inch): 8-12 ft-lbs
- Band clamps (3.0-5.0 inch): 10-15 ft-lbs
- U-bolt clamps: 15-20 ft-lbs
- V-band clamps: follow manufacturer spec (typically 8-10 ft-lbs for small, up to 25 for large)
Tool checklist:
- Torque wrench (inch-lb or ft-lb range)
- Replacement bolt kit (stainless steel, same thread pitch)
- Nickel anti-seize compound
- Thread chaser (if cross-threading damage is suspected)
Problem 4: Exhaust Pipe Slipping Out of Clamp (Lap Joint Failure)
Symptoms: The joint separates partially or fully. Exhaust noise increases suddenly and dramatically. The pipe hangs loose or rests against another component, creating a secondary rattling sound. In severe cases, the exhaust system drags on the ground.
Likely cause: Insufficient pipe overlap inside the clamp. Lap joints — where one pipe slides inside another — need at least 1-2 inches of overlap for the clamp to grip properly. With less than one inch of overlap, the clamp’s band is holding onto the very edge of the pipe, where it has the least mechanical advantage.
Another common cause is worn or missing expansion rings on sleeve-type connections. Some OEM and aftermarket exhausts use a flared end or expansion ring to create a positive stop — if this ring has been cut off during a previous repair, the pipe has nothing to stop it from sliding out.
Fix: Disassemble the joint completely. Clean both pipe ends with a wire brush to remove rust and carbon buildup that may prevent full insertion. Reassemble with at least 2 inches of overlap between the inner and outer pipe. If the original pipe lengths don’t allow this, you have three options:
- Add a second clamp: Install a second clamp 1-2 inches behind the first one. This creates redundancy and prevents the joint from slipping even if one clamp loosens slightly.
- Switch to a sleeve clamp: Sleeve-style clamps (sometimes called “band clamp connectors”) wrap around the joint to provide 360-degree compression over a wider band area. These work better than standard butt clamps on marginal overlaps.
- Install a weld-on alignment tab: For permanent repairs on non-removable sections, a small tack weld or alignment tab can serve as a mechanical stop.
If pipe slippage is accompanied by physical cracks or severe joint misalignment, check out our companion guide on diagnosing 7 common exhaust clamp problems for step-by-step realignment and emergency repair procedures.
Prevention: Before final assembly, mark both pipes at the correct overlap distance with a permanent marker. This gives you a visual reference during installation so you know the overlap is correct before tightening the clamp.
Problem 5: Rattling Noise From Exhaust Clamp
Symptoms: Metallic rattle that changes with engine RPM. Most noticeable at idle or low speed. May disappear at cruising speed or come and go depending on engine load.
Likely cause: Two common scenarios: (1) The clamp has loosened from vibration over time — thermal cycling (heating and cooling) causes expansion and contraction that can reduce clamp tension. (2) The clamp body or its hardware is physically contacting another part of the vehicle — the chassis, a heat shield, a suspension component, or wiring.
A third, less common cause is the clamp being installed “backwards” or on the wrong side of a joint feature. Some clamps have a directional band that must be oriented correctly relative to the pipe joint.
Fix: Step one is diagnostic: determine whether the noise is the clamp itself or the pipe touching something else.
- Check bolt tightness: Re-torque to spec (see torque table above). Thermal cycling can loosen clamps gradually over 500-1000 miles of driving, especially on new installations.
- Check clearance: With the engine running and the vehicle safely lifted, listen for where the noise originates. If the clamp is tight but still rattling, look for contact points between the clamp and any nearby component. A clearance of less than 0.5 inches can cause intermittent contact when the engine flexes under load.
- Check band orientation: On band clamps with a stepped or tapered design, ensure the band is oriented so it tightens evenly — the thicker part of the band should contact the pipe first.
- Add heat shield or stand-off: If clearance to a chassis component is the issue, a simple heat shield or spacer bracket can provide the needed gap.
One tip from our shop experience: rattling caused by a loose clamp (scenario 1) tends to occur immediately after installation or after a long drive. Rattling caused by contact (scenario 2) tends to vary with RPM and may appear only in gear, not in park. This distinction can save you an hour of searching.
How to Remove a Rusted or Seized Exhaust Clamp
Dealing with a clamp that has rusted solid to the pipe is a common headache. If the bolt won’t budge, don’t just use a longer breaker bar — you’ll likely snap the bolt or warp the exhaust pipe. Here is the safest method for removing a stubborn clamp:
- Soak it: Spray a high-quality penetrating oil directly onto the bolt threads and the joint where the clamp meets the pipe. Let it sit for at least 15-30 minutes, or overnight if possible.
- Apply heat: Use a propane or MAP gas torch to heat the nut (not the bolt). The heat causes the nut to expand slightly, which can break the rust bond.
- Use an impact wrench: Short, controlled bursts from an impact wrench can vibrate the rust loose much better than steady pressure from a hand ratchet.
- Cut it (last resort): If the nut rounds off or the bolt is completely fused, use a rotary tool with a cutoff wheel or an angle grinder to carefully slice through the bolt or the clamp strap. Be extremely careful not to cut into the exhaust pipe itself.
When to Replace vs. Repair
- Replace if the clamp body is rusted through, the band is distorted or bent, the bolt threads are stripped beyond repair, or the clamp has been over-tightened to the point of deformation.
- Repair if it’s just loose, mispositioned, or the wrong size. A correctly sized and properly installed SS304 clamp should last the life of the exhaust system with no maintenance beyond an occasional bolt check.
Maintenance Schedule
A good exhaust clamp installation should be maintenance-free for years. But if you want maximum longevity, follow this simple schedule:
- After first 100 miles: Re-check bolt torque. Heat cycling will have settled the clamp.
- Every oil change: Visual inspection for rust, cracking, or signs of loosening.
- Annually: Spray bolt threads with penetrating oil to prevent seizing (if you live in a salt-belt state, do this before winter).
- After any exhaust work: Always install new clamps. Reusing old clamps on new pipe is the leading cause of “that leak we didn’t have before” comebacks.
Clamp Type Overview
| Type | Best For | Sealing Quality | Reusable | DIY Friendly |
|---|---|---|---|---|
| Band clamp (lap joint) | Slip-fit connections | Excellent | Yes (1-2 times) | Yes |
| U-bolt clamp | Heavy duty, trucks | Good | Yes | Yes |
| V-band clamp | Turbo connections, race applications | Excellent | Yes (many times) | Moderate (requires flanges) |
| Sleeve clamp (butt joint) | Where pipes meet end-to-end | Very good | Limited | Yes |
| Spring-loaded clamp | Flex joints, OEM replacements | Good | Yes | Moderate |
Frequently Asked Questions
Q: Can I reuse an exhaust clamp?
A: Band clamps can typically be reused once or twice if the band isn’t distorted. U-bolt clamps are more reusable, but we recommend replacing any clamp that has visible wear, bending, or rust pitting. For shops, the labor cost of replacing a reused clamp that fails later far outweighs the cost of a new clamp.
Q: How do I know what size exhaust clamp I need?
A: Measure the outside diameter of your exhaust pipe at the joint. Don’t guess based on the pipe’s nominal size (a “3-inch” exhaust pipe often measures closer to 3.05 or 3.10 inches). Use a caliper for accuracy.
Q: Should I use exhaust sealant with a clamp?
A: For lap joints with a band clamp, sealant is optional — a properly fitted clamp seals mechanically. For butt joints with a sleeve clamp, a thin bead of high-temp silicone sealant around the pipe end ensures a gas-tight seal.
Q: Why does my clamp make noise only at certain RPMs?
A: Exhaust systems flex under engine load, and certain RPM ranges create resonant frequencies that amplify vibration. If a clamp is loose or a pipe is contacting something, those frequencies will make the noise obvious while lower/higher RPMs may mask it.
Q: How long should an exhaust clamp last?
A: An SS304 clamp on a properly fitted exhaust joint should last 5-10 years or more. Carbon steel and SS201 clamps typically need replacement every 1-2 years in corrosive environments.
Still troubleshooting? Contact LEDAUT support — we manufacture these clamps and can help diagnose the issue.