You just ordered an exhaust clamp for your project car. It arrives, you slide it over the pipe—and it’s either too tight to fit or so loose it spins. Now you’re waiting another week for the right size, and the job sits half-finished.
We hear this story more often than you’d think. At LEDAUT, wrong size is the #1 reason for customer complaints and returns. Most of the time, it’s not because people don’t know their car—it’s because they don’t know how to measure their pipe. Whether you’re repairing a rusted factory exhaust or building a custom stainless system from scratch, getting the clamp size right is the single most important step. A clamp that fits properly creates a leak-free seal, distributes clamping force evenly around the pipe, and stays tight through thousands of miles of heat cycles and vibration.
This guide walks you through exactly how to pick the right size, every time.
- Always measure the Outside Diameter (OD) of the pipe, not the inside or the old clamp.
- Use the caliper method for exact measurements, or the string/tape method for a close estimate.
- Choose SS304 stainless steel for winter/salt environments, and SS201 for budget/dry climate builds.
- Band clamps are best for general repairs; V-band for quick disconnects.
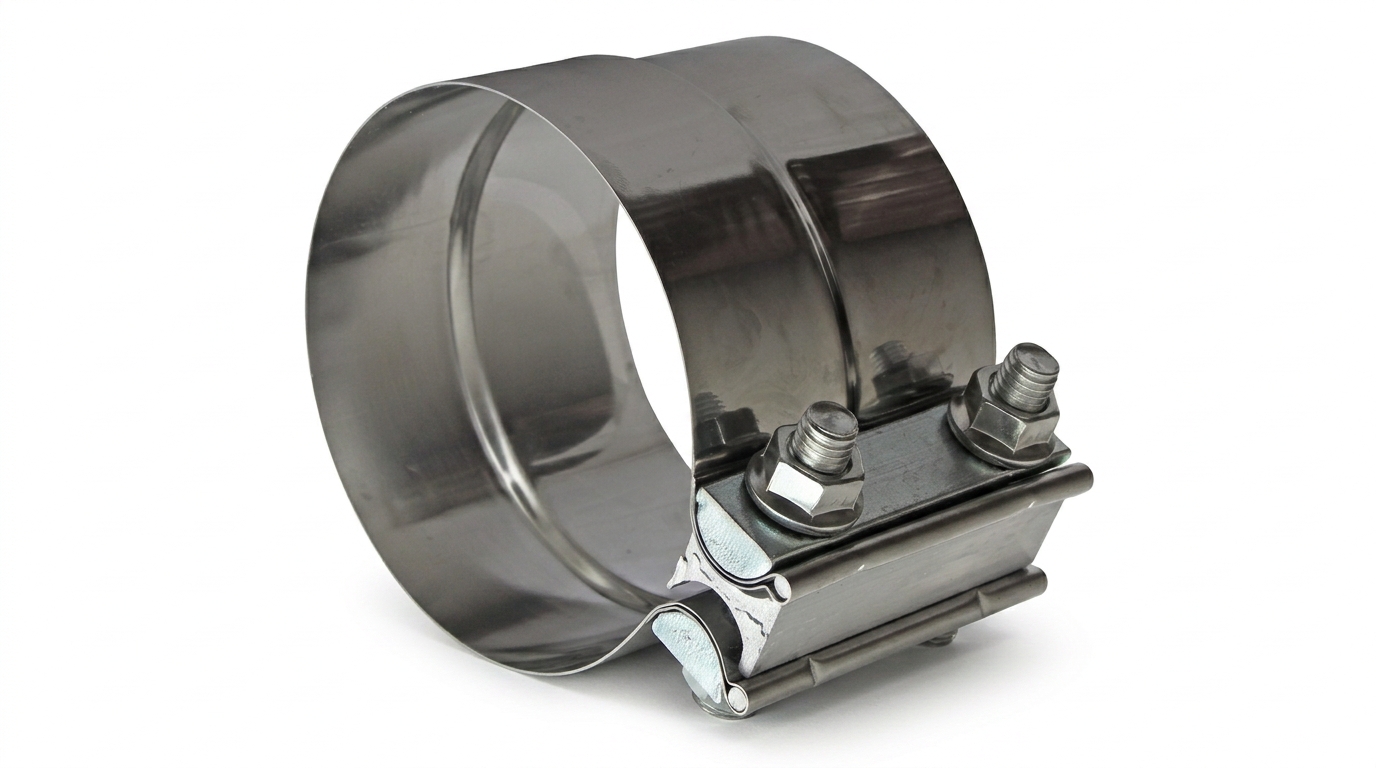
Why Size Matters
An exhaust clamp that doesn’t fit properly creates problems that go beyond a loose connection. Understanding what goes wrong with each sizing error helps you diagnose issues before they become expensive repairs.
Too small. The clamp physically can’t fit over the pipe. You force it, strip the bolt threads, and now you’ve got a bent clamp and a scratched pipe. In the worst case, you damage the pipe itself—ovalizing a thin-wall exhaust tube, which creates a permanent leak that no clamp can ever fully seal. That means cutting out that section of pipe and welding in a replacement, turning what should have been a 15-minute clamp install into an afternoon of fabrication work.
Too large. The band doesn’t make full contact around the circumference. Gaps appear, exhaust gases leak, and you get that annoying tick you can never quite locate. But the problems don’t stop there. A loose clamp allows the joint to move under engine torque, gradually wearing down the pipe surface where the clamp grips. Over time, this fretting wear can thin the pipe wall to the point of failure. Even if the clamp eventually tightens down, it’s clamping on a worn, undersized section of pipe that won’t hold a proper seal.
The ripple effect. A bad seal means vibration. The joint becomes a pivot point. That vibration travels through hangers and chassis—and eventually shows up as a rattle that sends customers chasing phantom problems. Exhaust leaks also affect engine performance by disturbing the backpressure profile, which can trigger O2 sensor codes and reduce fuel economy by 2-3% on modern vehicles with closed-loop fuel trims.
How to Measure Your Exhaust Pipe
Exhaust pipe sizes are nominal—they refer to outside diameter (OD), not inside diameter. Here’s how to get it right:
The Circumference Method
Wrap a flexible tape measure around the pipe where the clamp will sit. Divide that number by 3.14159 (π). That’s your OD.
No tape measure? Use a piece of string or a zip tie. Mark the overlap, lay it flat against a ruler, and do the math. This method is accurate to within about 0.020” if you’re careful—close enough for most band clamps, which typically have 0.100” to 0.150” of adjustment range.
The Caliper Method (More Accurate)
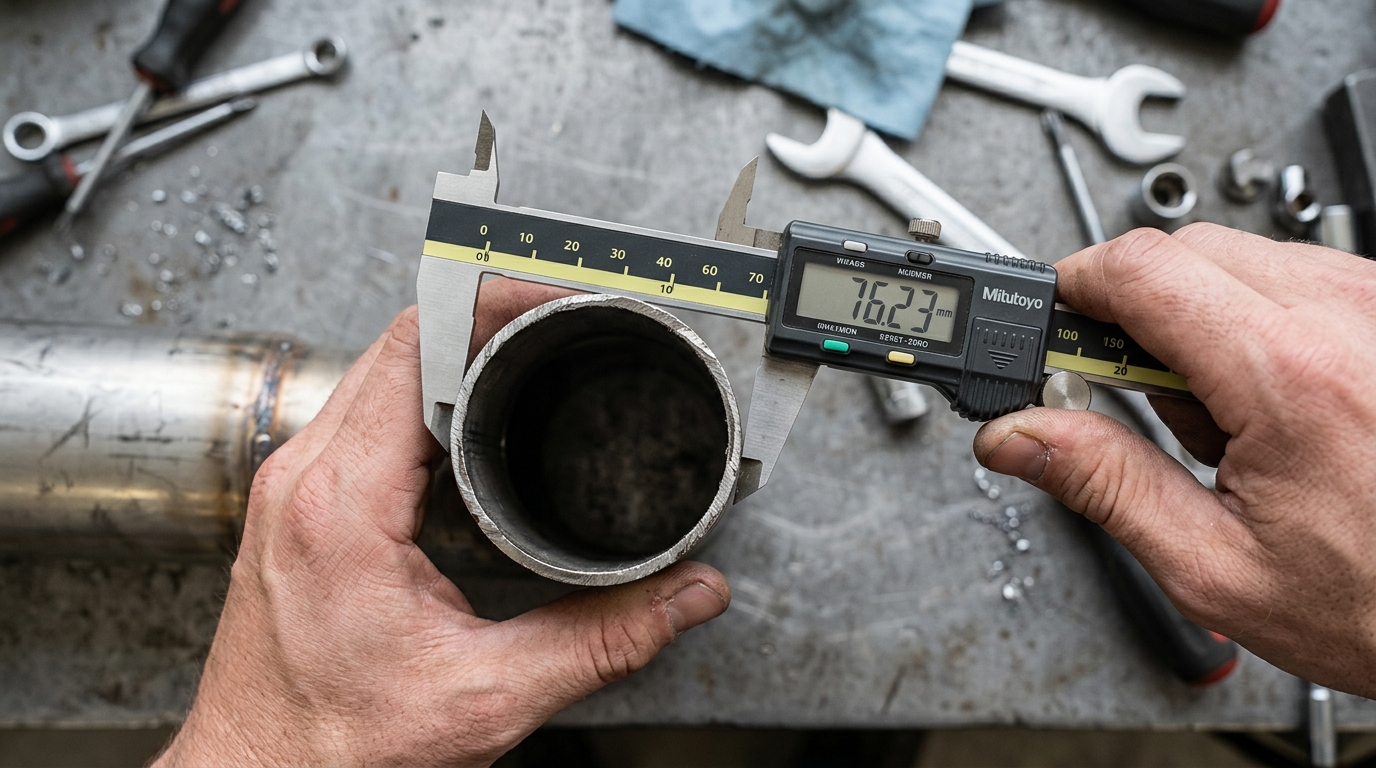
For the most precise measurement, use a digital caliper rated to at least 4 inches. Open the jaws wider than the pipe, then zero the caliper before closing on the pipe. Take three measurements at different points around the circumference and average them. This method is accurate to within 0.005” and is the recommended approach for critical joints like turbo-downpipe connections or exhaust manifolds where even a tiny leak affects engine performance.
If you don’t own calipers, a $10 pair from Harbor Freight or Amazon does the job well enough for exhaust work. Keep a pair in your toolbox—they pay for themselves the first time they save you from ordering the wrong clamp.
Where to Measure
Pipes aren’t always perfectly round after years of heat cycling. Measure in at least two spots around the circumference. Use the largest reading—the clamp needs to fit over the widest point. On older vehicles, check especially near weld joints and flange connections—these areas often deform differently than the straight pipe sections.
Common Mistakes
- Don’t measure the old clamp. Clamps stretch and deform over time, and the old clamp’s stamped size is often inaccurate after years of heat exposure.
- Don’t guess based on vehicle model. A “3-inch exhaust” might actually measure 2.875 inches. Aftermarket exhaust systems frequently have slight OD variations from the nominal advertised size.
- Measure at the overlap if you’re clamping a lap joint—it will be slightly larger than the straight pipe. Add 0.030” to 0.060” to your measurement for lap joints to account for the double wall thickness.
- Don’t measure a cold pipe and forget about thermal expansion. Stainless steel expands about 0.010” per foot at typical exhaust temperatures, so a pipe that measures 3.000” cold will be about 3.030” at operating temperature.
Exhaust Clamp Size Chart
| Nominal Size | Typical OD Range | Best Application |
|---|---|---|
| 2.5-Inch | 2.45” to 2.60” | Compact cars, OEM replacements (4-cylinder) |
| 3-Inch | 2.95” to 3.10” | Performance builds, turbo cars, aftermarket V6/V8 |
| 4-Inch | 3.90” to 4.10” | Heavy-duty trucks, diesel exhausts, large V8s |
| 5-Inch | 4.90” to 5.10” | Commercial diesel, race builds, compound turbos |
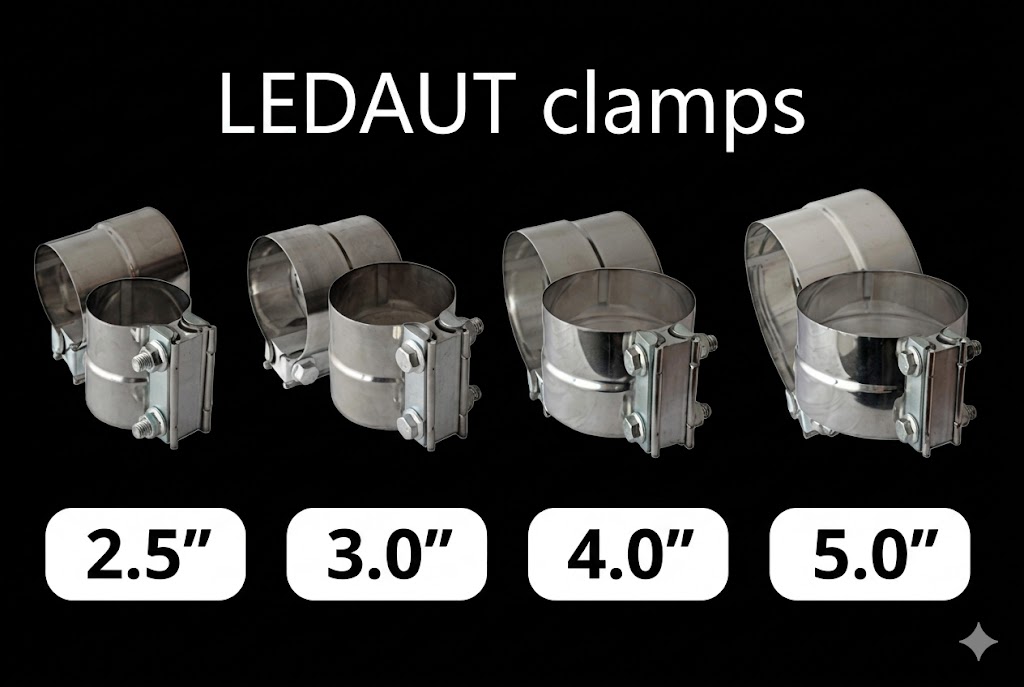
2.5-Inch Clamp
Typical OD range: 2.45” to 2.60”
Most common size for stock exhausts on compact sedans and hatchbacks (Honda Fit, Toyota Corolla, Mazda 3). Also the go-to for resonator deletes on smaller displacement engines. This size covers the vast majority of 4-cylinder vehicle exhausts from 2010 onward. If you work primarily on compact cars and Japanese imports, a stock of 2.5” clamps will cover 70% of your jobs.
→ Shop LEDAUT 2.5-Inch Band Clamps
3-Inch Clamp
Typical OD range: 2.95” to 3.10”
Standard for performance builds—turbocharged cars (Subaru WRX, VW GTI, Ford Focus ST), aftermarket cat-back systems on V6 platforms, and universal performance mufflers. This is the most versatile size for the DIY performance crowd. Many modern turbo 4-cylinders come from the factory with 3” exhausts, so this size is increasingly common on newer vehicles as well.
→ Shop LEDAUT 3-Inch Band Clamps
4-Inch Clamp
Typical OD range: 3.90” to 4.10”
Big-pipe territory. Heavy-duty trucks (Ford F-250, Ram 2500), diesel performance exhausts, and large-displacement V8 builds. On diesel trucks, the 4” clamp is the standard size for aftermarket downpipe-back exhaust systems. Gas V8 builds running long-tube headers also commonly step up to 4” for the main exhaust line.
5-Inch Clamp
Typical OD range: 4.90” to 5.10”
Race builds, drag cars, and extreme diesel performance (compound turbo setups). This size is less common in the DIY market but essential for shops servicing high-horsepower builds and commercial diesel trucks. If you’re working on semis or heavy equipment, the 5” clamp is a standard service item.
Which Clamp Type for Which Size?
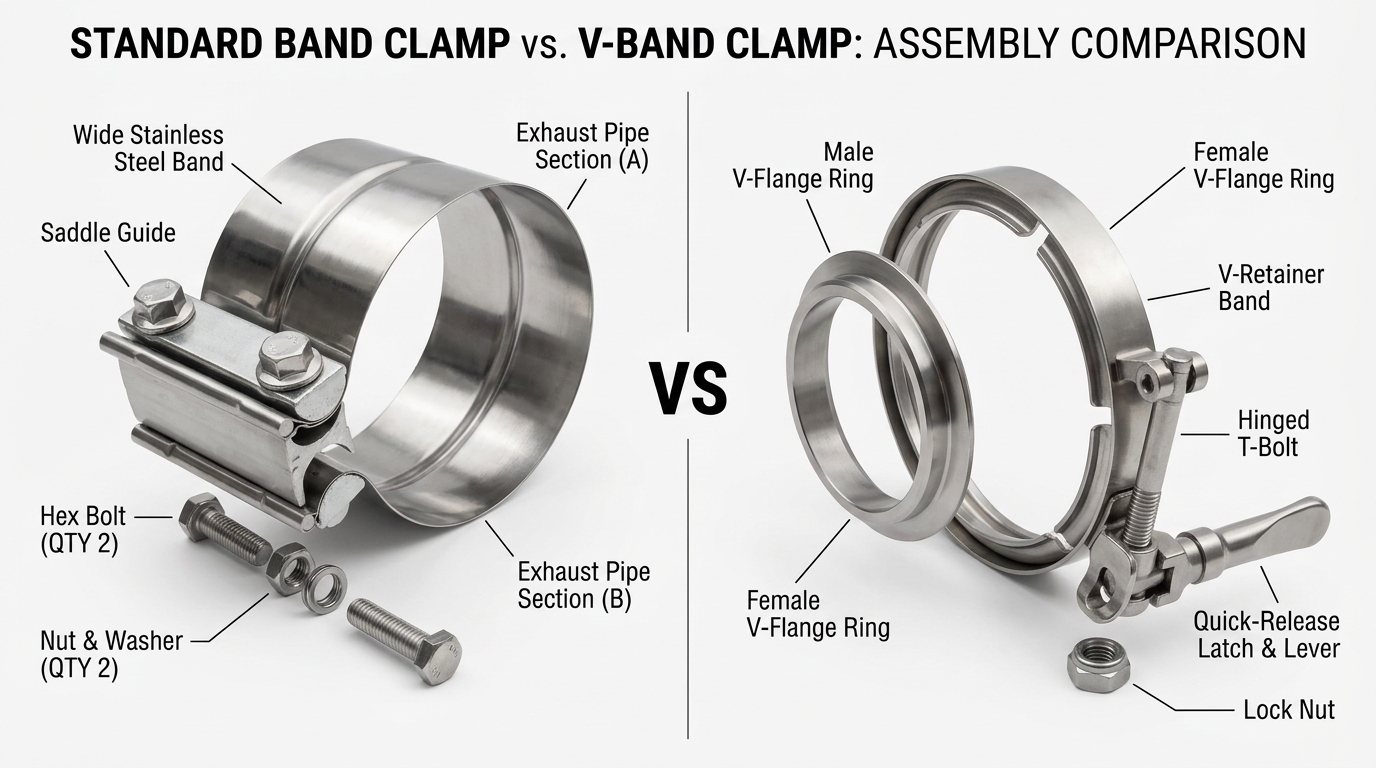
Band clamps work best for 2.5” to 4” OD. The wide band distributes pressure evenly and accommodates slight misalignment—ideal for most performance and repair applications. Band clamps are also reusable, so they’re the preferred choice for test-fitting exhaust systems before final welding.
V-band clamps are common on turbo plumbing where you need quick disassembly. They require matching flanges welded to the pipes. The V-band design allows for tool-free removal and reinstallation, making them ideal for applications where you frequently need to access internal components. However, V-band flanges must be welded precisely—a misaligned flange will leak regardless of how tight the clamp is.
Sleeve clamps suit heavy-duty commercial applications where pull-apart resistance matters more than ease of removal. These are often used on diesel exhaust systems where high exhaust temperatures (600°F+) demand maximum mechanical retention.
U-bolt clamps are the traditional design still used on many OEM exhaust systems. They’re inexpensive and widely available, but the point-loading from a U-bolt design can deform thin-wall exhaust pipes. For this reason, band clamps have largely replaced U-bolt clamps in the aftermarket and performance world.
Single vs Multi-Pack: What to Buy
For a single repair job, one clamp is enough. For a full exhaust system build, plan for one clamp per joint. A typical cat-back system needs 3-4 clamps (one for the downpipe connection, one at the resonator, one at the muffler, and often one more for the tailpipe tip). Many buyers stock up on multi-packs of the size they use most—usually 2.5” or 3”—so they always have one on hand. Shops especially benefit from multi-packs, since exhaust clamp replacements are often same-day jobs where waiting for a delivery isn’t an option.
Material Matters: SS304 vs SS201
| Material Grade | Key Feature | Best Application | Price Point |
|---|---|---|---|
| SS304 | 18% Chromium, 8% Nickel | Rust Belt, Coastal, Daily Drivers | Premium |
| SS201 | Manganese-based, Magnetic | Dry Climates, Show Cars, Budget Builds | Value / Budget |
We manufacture our clamps in two stainless steel grades. SS304 (18% chromium, 8% nickel) offers superior corrosion resistance and handles road salt and condensation without issue. It’s the same grade used in kitchen equipment and marine hardware for a reason—it simply doesn’t rust under normal automotive conditions. The higher nickel content also gives SS304 better low-temperature toughness, meaning it resists cracking in cold climates where the clamp might be stressed during winter repairs.
SS201 is a more budget-friendly option that still outperforms carbon steel. It uses manganese instead of nickel to achieve its corrosion resistance, which makes it magnetic (SS304 is non-magnetic). For dry-climate daily drivers or show cars that rarely see rain, SS201 provides excellent service life at a lower price point. The corrosion resistance of SS201 is roughly equivalent to SS304 in dry conditions but degrades faster in sustained salt exposure.
For coastal areas or year-round daily drivers in the Rust Belt, SS304 is the right call. The price premium is modest (typically 15-25% more than SS201) and the lifespan difference can be 3-5 years longer in corrosive environments. For a part that costs under $20, that’s an easy value calculation.
→ Browse our complete lineup of Stainless Steel Exhaust Clamps
Installation Tips for a Perfect Seal
Even with the right size clamp, installation technique matters. Clean the pipe surface where the clamp will sit—any rust scale, undercoating, or paint will prevent full contact and create a leak path. A wire brush or sanding disc on an angle grinder takes 30 seconds and eliminates this issue entirely.
Apply anti-seize compound to the threads of the clamp bolts before tightening. This ensures you can remove the clamp later without snapping bolts, especially on exhaust systems that see road salt. Tighten the clamp in stages: take each bolt to half-torque, then alternate sides until fully tight. This distributes the clamping force evenly around the band and prevents the band from cocking sideways on the pipe.
The final check: start the engine cold, let it reach operating temperature, then re-check clamp tightness. As the exhaust system heats and expands, the initial cold-tightened clamp may loosen slightly, so a quick second pass with the wrench catches this before it becomes a leak.
When to Replace vs Reuse
Not all clamp issues require a new part. If the band is straight, the threads are clean, and the clamp hasn’t been over-tightened to the point of stretching, you can reuse it. But inspect carefully: cracks near the weld joint, stripped threads, or a band that won’t return to its original shape after loosening are all signs the clamp is past its useful life. Band clamps that have been installed for 5+ years in corrosive environments should be replaced proactively during any exhaust service.
Final Checklist Before You Buy
- Measure the OD in two places—use the larger reading
- Match your measurement to the clamp’s rated range (not the nominal pipe size)
- Pick the clamp type that matches your application (band clamp for most, V-band for quick-disconnect)
- Choose SS304 for longevity in corrosive environments, SS201 for budget builds
- Check that you have the right number—count every joint in the system
- Inspect old clamps for signs of fatigue before reusing
Still not sure? Contact us with your pipe measurement and we’ll recommend the right clamp.