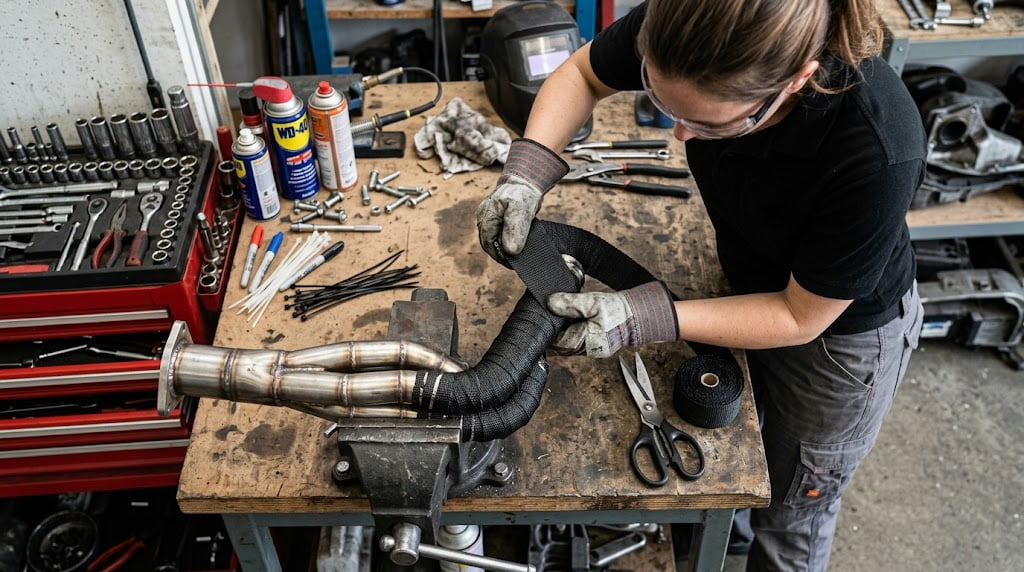
Before the first turn goes on, get the tools in one place: a 2-inch roll of wrap, stainless steel ties, gloves that will not itch, and a bucket of water. Then it is five steps — soak the wrap, start at one end, keep a 50% overlap, hold tension through the bends, and lock the ends with stainless ties. The method is simple; the mistakes are not obvious until the wrap fails a season later, which is what this guide is built to prevent.
But if done wrong — uneven overlap, loose spots, cheap materials — it can trap moisture, accelerate corrosion, and fail within months. We’ve seen both outcomes at LEDAUT, and this guide is built around what consistently works.
Here’s the exact process we recommend.
Materials Checklist: The Best Exhaust Wrap & Stainless Ties for the Job
Before you start, make sure you have the right materials. The quality of each component directly affects how long the wrap lasts and how well it performs.
- Exhaust wrap — Measure the length of pipe you’re wrapping, then add 50% for overlap. For a typical 4-cylinder header (about 4–5 ft of pipe), you’ll need roughly 6–7.5 ft of wrap. For a V8, plan on 10–15 ft depending on header configuration. When in doubt, order extra — unused wrap can be returned or kept for future jobs.
- Stainless steel zip ties or clamps — Use stainless, not zinc-plated (they’ll rust within months under exhaust heat). We recommend LEDAUT 304-grade stainless ties rated for exhaust temperatures. Plan on one tie every 6–8 inches, plus one at each end.
- Heavy-duty gloves and long sleeves — Fiberglass irritation is real with basic wraps. Even “silent” or bonded wraps shed fibers during cutting and handling. We recommend mechanics’ gloves with leather palms and a long-sleeve work shirt. Disposable dust masks are optional but helpful, especially in tight garages.
- Spray bottle with water — For pre-soaking and re-wetting stubborn sections during installation.
- Utility knife or scissors — A sharp utility knife with a fresh blade gives the cleanest cut. Scissors work, but they tend to fray the edges of fiberglass wraps.
- Measuring tape — Critical for calculating wrap length and keeping overlap consistent across long runs.
- Wire brush or sandpaper — For cleaning the pipe surface. A drill-mounted wire cup brush saves significant time on rusty or heavily scaled pipes.
Fiberglass irritation is real. Even “silent” or bonded wraps shed microscopic fibers during cutting and handling. Always wear heavy-duty mechanics’ gloves with leather palms and a long-sleeve work shirt. A disposable dust mask is highly recommended, especially when working in tight garages.
Wrap material quick reference
| Material | Max Temp | Ease of Install | Best For |
|---|---|---|---|
| Fiberglass (standard) | ~800°F | Good | Street cars, light track use |
| Basalt | ~1,200°F | Moderate | Turbo manifolds, high-heat zones |
| Titanium (ceramic) | ~1,800°F | Stiff | Race cars, extreme builds |
Step 1: Prep the Exhaust Header (Crucial to Prevent Rust Under Wrap)
Clean the exhaust pipe thoroughly. Remove rust, oil, grease, and old gasket material. A wire brush or sandpaper works well for this. For heavy rust scale, we recommend a drill-mounted wire cup brush — it cuts cleaning time from 30 minutes to under 10 on most headers. For oily or greased pipes (common after repair work), wipe down with brake cleaner or isopropyl alcohol before brushing.
The wrap needs to grip a clean surface — any contamination underneath will turn into a weak spot over time as heat cycles break it down. Oil residue in particular creates localized hot spots that accelerate wrap degradation from the inside out.
To completely bulletproof your setup against rust, spray the bare, cleaned pipe with a high-heat silicone coating sealant (and let it cure) before wrapping. After installation, you can also spray the outside of the fiberglass wrap. This seals the material, repels moisture, and significantly extends the life of both the wrap and the header!
If the pipe has sharp edges (from previous cutting or welding), file them smooth. Sharp edges cut through wrap from the inside, and you won’t notice until the wrap fails months later. This is especially common on DIY headers and budget downpipes. Take 60 seconds with a flat file — it eliminates a failure point that no amount of careful wrapping can fix.
For coated or ceramic headers, check with the coating manufacturer before wrapping. Some ceramic coatings require air circulation and wrapping them may void the warranty.
Step 2: How to Pre-Soak Fiberglass Wrap for Maximum Flexibility
Submerge the wrap in water for 5-10 minutes. Soaking does three things: it makes the wrap more flexible for tight bends, lets you pull it tighter during installation (the wrap shrinks slightly as it dries), and reduces airborne fibers during handling.
Squeeze out excess water before starting — dripping wet is too much. The wrap should be damp, not soaked. If you can wring out visible water, you’ve oversaturated it. A good test: press the wrap against your forearm — it should feel cool and damp, but no water should run off.
Different wrap materials absorb water differently. Standard fiberglass wraps soak up water quickly and are ready in 3–5 minutes. Basalt wraps are denser and may need 8–10 minutes to fully saturate. Titanium wraps absorb very little water — for those, dampen by hand as you go rather than submerging the full roll.
Once you start installing, work continuously. If the wrap dries out before you finish, re-spray with a misting bottle. Don’t re-submerge a partially installed wrap — it’s impractical and the water trapped under already-wrapped sections won’t dry evenly.
Step 3: Start at the Header Flange (Wrapping from Hot to Cold)
Always start wrapping at the end closest to the engine — the header flange on exhaust manifolds or the turbo outlet on forced induction systems. This is the hottest point, and starting here ensures the overlap direction sheds water and debris away from the engine.
This direction matters more than most DIYers realize. If you wrap from the cold end toward the hot end, the overlapping edges face forward — water spray from the road, engine bay washdowns, and condensation all have a path to seep into the wrap layers. Over time, this trapped moisture accelerates corrosion under the wrap. Wrapping from hot to cold means each overlap faces rearward, so water runs off and drains away naturally.
The same principle applies to turbocharger housings and exhaust manifolds. If your setup has multiple separate sections (e.g., individual header primaries), wrap each section from its hottest point outward.
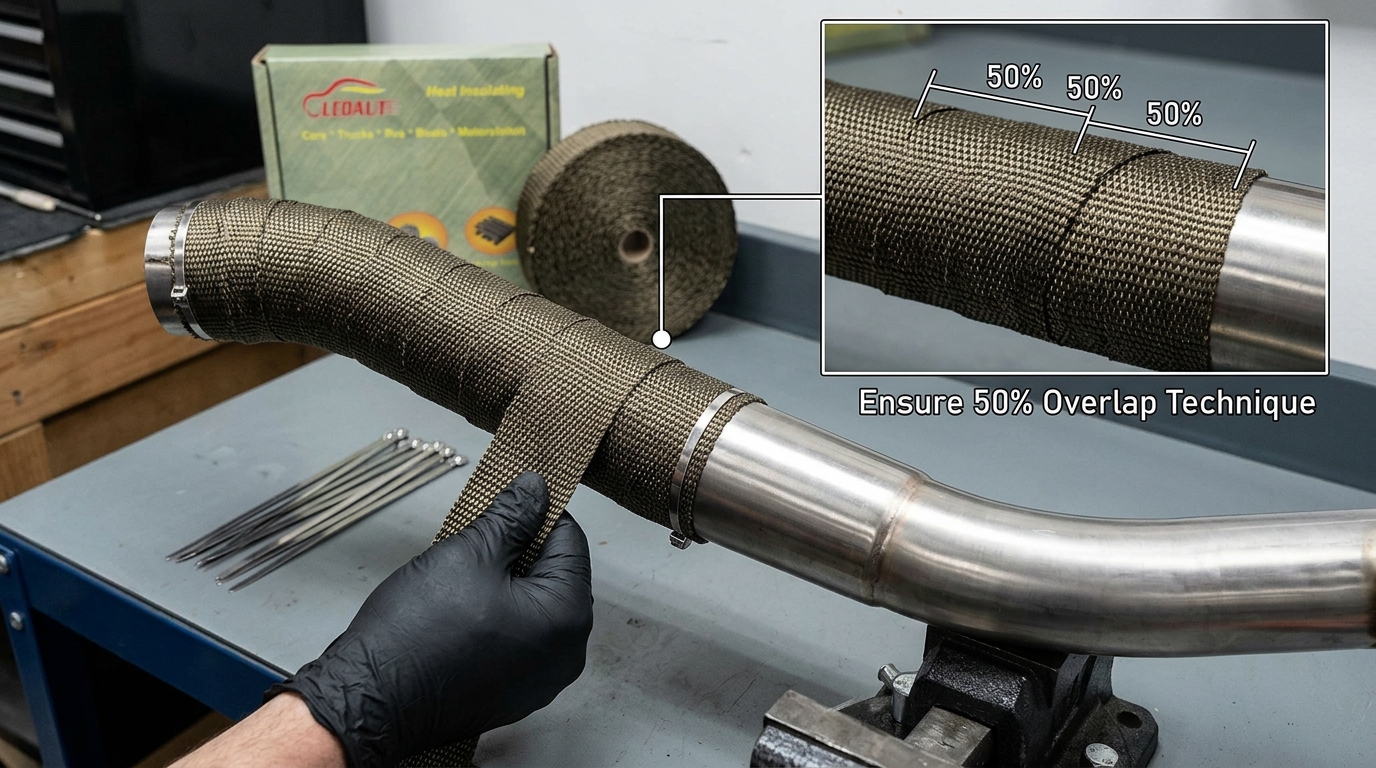
Step 4: Apply the 50% Overlap Rule for Maximum Heat Reduction
This is the most important technique in exhaust wrap installation. Each wrap should overlap the previous layer by exactly half its width. This means every section of pipe is covered by two layers of wrap — doubling the insulation and creating a uniform appearance.
Why exactly 50%? Less overlap (say 25–30%) leaves single-layer sections exposed, creating cold spots in your insulation. More overlap (75%+) wastes wrap material without giving proportional thermal benefit. 50% is the efficiency sweet spot.
Here’s a quick comparison:
| Overlap % | Layers | Wrap Used vs Pipe | Result |
|---|---|---|---|
| 25% | 1.3× | ~1.3× pipe length | Hot spots, uneven insulation |
| 50% | 2× | ~2× pipe length | Optimal insulation, clean look |
| 75% | 4× | ~4× pipe length | Wasteful, bulky, harder to secure |
To maintain consistent overlap, watch the edge of the wrap as you go. If you start overlapping 60% in one spot and 40% in another, the wrap will look uneven and create hot spots where the insulation is thinner. A simple trick: draw a thin reference line along the edge of the wrap roll with a marker before cutting — you can visually track the edge as you spiral it around the pipe.
Step 5: Maintain Strict Tension to Eliminate Air Gaps & Moisture
Pull the wrap tight as you go — firm tension, not ripping tension. Loose wrap creates air gaps that trap heat and moisture against the pipe, which accelerates corrosion. Consistent tension throughout the length creates better insulation and a cleaner final appearance.
How tight is “tight enough”? A good rule of thumb: you should feel steady resistance when pulling, but the wrap shouldn’t deform or narrow visibly under tension. If the wrap starts to thin out or the weave opens up, you’re pulling too hard. If it feels slack and you can push it sideways with a finger, it’s too loose.
On straight sections of pipe, maintaining even tension is straightforward. On tight bends and corners, you may need to twist the wrap slightly to keep it flat. This is normal — basalt wraps handle twisting better than basic fiberglass. On 90-degree bends, we recommend making a single small relief cut on the inner edge of the wrap to help it lay flat. Cut just enough to ease the bend — no more than 1/4 of the wrap width.
For collector sections where multiple header primaries merge, wrap each primary individually up to the collector flange, then wrap the collector as a single straight section. Don’t try to wrap through a merge with one continuous strip — the geometry makes consistent tension impossible.
Step 6: Lock it Down with High-Temp 304 Stainless Steel Ties
Use stainless steel zip ties at the starting end, the finishing end, and every 6-8 inches along the length. Position each tie so the locking mechanism sits on the underside of the pipe — out of sight and protected from direct water spray.
Don’t overtighten the zip ties. They should be snug enough to hold the wrap, but not so tight that they cut into the wrap material. Snug + a quarter turn is the sweet spot. If you hear the wrap fibers crackling as you tighten, back off slightly.
For pipes that see extreme vibration (off-road vehicles, competition cars), we recommend using stainless steel band clamps instead of zip ties every 12–18 inches as reinforcement. These provide more holding force and won’t loosen over time. For standard daily drivers and street builds, quality zip ties at proper intervals are sufficient.
Allow the zip ties to remain visible during the first heat cycle — you may need to retighten them. Trim the tails flush with the locking head only after the wrap has fully dried and settled.
Step 7: Heat Cycling (How to Cure and Shrink Your Exhaust Wrap)
After installation, start the engine and let it idle for 10-15 minutes. The heat will dry the wrap and cause slight shrinkage, tightening the fit. After the engine cools, check all zip ties and retighten if needed — they often loosen slightly as the wrap settles.
For the first few heat cycles, you may notice a slight smell as residual moisture and manufacturing oils burn off. This is normal and will disappear after 2-3 drives. If the smell persists beyond the third drive, check for oil leaks near the exhaust — that’s a separate issue, not the wrap.
We recommend three full heat cycles (idle → full operating temperature → cool to ambient) before subjecting the wrap to sustained high-RPM or full-load operation. Each cycle further settles the wrap and lets the fibers lock into position. After this break-in period, the wrap will hold its shape and tension for the long term without needing readjustment.
During the first week, inspect the underside of the wrap after each drive for any signs of moisture accumulation. If you see wet spots or discoloration, the wrap may be too tight in those areas and not allowing trapped moisture to escape — partially loosen one or two ties to let it breathe.
Common Exhaust Wrap Mistakes & Why Installations Fail
- Not soaking the wrap: Dry wrap is stiff and hard to tension properly. It also creates more airborne fiber dust during installation. Soaking is a 5-minute step that transforms the installation experience.
- Irregular overlap: Creates uneven insulation and looks unprofessional. Once the wrap dries and shrinks, uneven overlap becomes permanent — you can’t reposition it.
- Loose tension: Traps moisture, causes corrosion under the wrap. Loose wraps also flutter at highway speeds, creating noise and fatigue damage.
- Incorrect zip tie placement: Too few ties = wrap shifts, too tight = wrap tears. Stick to 6–8 inch spacing and check each tie individually.
- Not heat cycling: The wrap needs one heat cycle to fully seat. Skipping this step means the wrap never reaches its final tension — it will loosen over the first few weeks.
- Wrapping over rust or contamination: Any contamination trapped under the wrap accelerates pipe failure. Take the extra 10 minutes to clean thoroughly before wrapping.
- Using zinc-plated ties: They look fine initially but rust quickly under exhaust heat, leaving loose wrap within 2–3 months. Always use 304-grade stainless.
FAQ
Can I wrap a cracked or damaged exhaust pipe?
No. Wrap is an insulator, not a structural repair. Cracks, pinholes, or weak sections will only get worse as trapped heat accelerates the damage. Repair or replace the pipe before wrapping.
How long does exhaust wrap last?
With proper installation and normal road use, quality wrap lasts 2–4 years. Basalt and titanium wraps at the higher end, standard fiberglass wraps closer to 2 years. Inspection every 6 months is recommended — look for fraying edges, discoloration, and loose ties.
Does wrapping affect exhaust gas temperature (EGT) readings?
Yes. Wrapped pipes retain more heat in the exhaust stream, which can raise EGT readings by 50–100°F at the sensor. If you tune based on EGT, check your baseline after installing wrap and recalibrate if necessary.
Can I drive immediately after wrapping?
Yes, but limit to short trips and avoid sustained high RPM until at least one full heat cycle is complete. The wrap needs to dry and shrink before it reaches full holding strength.
Should I wrap the entire exhaust system or just the header?
Wrapping the header and downpipe gives the most benefit for under-hood heat management. Wrapping further downstream (mid-pipe, muffler) has diminishing returns and can accelerate condensation-related corrosion in the cooler sections of the exhaust.
Ready to Wrap Like a Pro?
Don’t ruin a good wrap job with cheap accessories. Get the exact high-temp materials the pros use.