The call comes in from our resellers’ shops in the same shape most months. A truck rolls in, the owner reporting a burning smell underneath — sharp, with a thread of smoke after ten minutes at idle. The tech’s finding is usually the same too: wrap scorched brown in a couple of spots, frayed on one edge, one section hanging loose against the pipe.
The wrap had done its job for tens of thousands of miles. Now it was the problem.
Notice what that shop actually wanted first, before anyone picked up a knife: does this wrap really need to come off, or can it be tidied up and left alone? That’s the question most people are standing on when they start looking for ways to take off exhaust wrap. And ignoring it has teeth — a burned-through wrap stops insulating, heat soaks back into the hood and the wiring running over it, and loose glass fiber holds moisture against the pipe until surface rust shows up at the seams. For a shop, the loose wrap itself is a comeback waiting on the next lift visit.
So this is the order we’ll cover: the failure signs that settle the replace-or-keep call, then the removal itself — tools, steps, and when reusing old wrap is legitimate and when it’s false economy.
Signs You Need to Replace Exhaust Wrap
Not every discolored wrap is dead, and not every dead wrap looks dramatic. Here’s what actually tells you the material has stopped doing its job.
Burn-through and discoloration. The most common failure we see in comeback photos is browning. Here’s the mechanism: fiberglass and basalt wraps are held together by a wax sizing. When pipe surface temps push past what the sizing can take, it chars and burns off — that brown stain is usually sizing leaving, not dirt. Fiberglass without sizing doesn’t shatter the same day, but it goes brittle and sheds. A wrap that looks black from the road but brown underneath is further gone than it appears from the shop floor. One more thing throws people off: the stainless steel tie holding a wrap down discolors with heat too — straw-yellow, blue — but that’s the metal reacting, not the wrap itself failing. Same eyeball, completely different verdict, so know which you’re looking at.
Smoke and smell that come back after the cure-off. New wrap smokes a little through its first few heat cycles; that’s the factory wax sizing burning off and it stops. Smoke and that acrid smell returning after a few thousand miles means the sizing is now burning off from the hot side. It’s the same fire that was supposed to be contained, just slower.
Loosening, sliding, or sagging. Pipe expands when hot and shrinks when cold, dozens of cycles a week. Over time that pumping works a spiral wrap looser, usually starting at the cut tail and over the joints. Once a section slides, bare pipe shows through — and exposed steel runs hotter than wrapped, which scorches the edge of the neighboring coil. Wrap failure cascades: one gap makes the next gap.
Heat you can feel in the wrong places. If the under-hood heat is back, the heat shield area runs hotter than it used to, or the cabin floor feels it on long drives, the wrap has stopped holding heat inside the pipe — which is the entire job. We covered what a wrap genuinely buys you in Does Exhaust Wrap Work?; when those effects fade, the material is done even if it’s still hanging on.
Tools for Removal
Good news: this isn’t a big list, and 30 minutes with hand tools beats 30 seconds with the wrong power tool on a thin-wall pipe.
| Tool | Reach for it when |
|---|---|
| Utility knife or heavy shop shears | Every normal removal |
| Heat gun | Stiff, baked-on sections that won’t peel — warm them, don’t force them |
| Stainless cable cutters | Tie-wire or band clamps holding the ends |
| Angle grinder with a thin cut-off wheel | Seized stainless ties only — light touch, never bite the pipe |
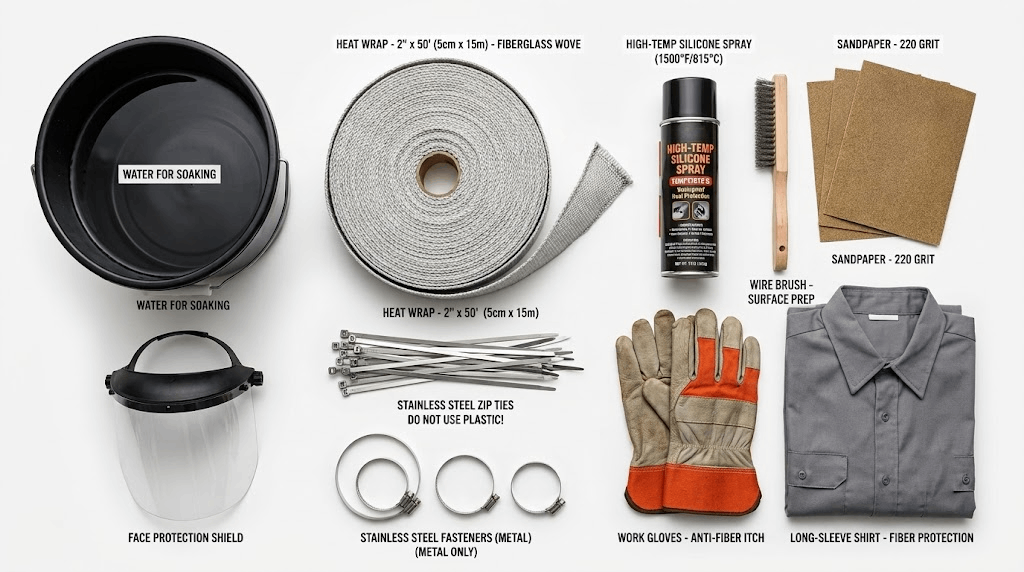
| Degreaser, brass brush, rags, gloves and eye protection | Cleanup afterward; loose fiberglass splinters |
Step-by-Step Exhaust Wrap Removal Process
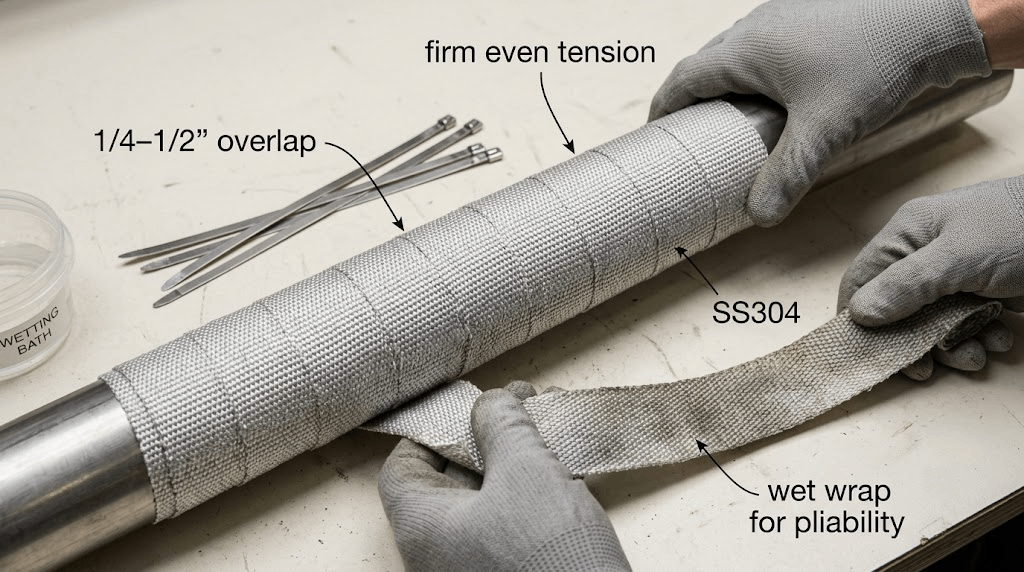
Step 1: Let it cool completely. Non-negotiable. Wrap is an insulator — that’s its whole design — so a pipe that’s been driven hard stays hot under the wrap long after the engine is off. The impatient removals go wrong right after a highway run — steam-hot material that looked cold. Wait until you can rest your open palm on the pipe for ten seconds. An hour minimum, ideally overnight.
Step 2: Find the tail and score one coil. Don’t start hacking mid-run. Find where the spiral overlaps at the cut end, then score along the seam, not across the pipe — shallow slices with the blade angled out. A spiral wrap loosens by unwinding: get one coil opened end to end and the rest often peels off in one continuous strip. A knife drawn around the pipe’s circumference is a knife hunting for a nick in thin-wall tubing, and every scratch you leave becomes a rust seed or a stress crack later.
Step 3: Peel it back. Pull the loosened strip steady and low, keeping your hand behind the peel. Brittle sections break into chunks instead — work them off piece by piece instead of yanking, or you’ll breathe fiberglass. Cut any tie wire as you reach it.
Step 4: Clean the pipe. You’ll be surprised what hides under a failed wrap — shed fiber matted into the surface, road grime, light rust blooms. Wire brush it, wipe it with degreaser, let it dry. A clean, dry, bare pipe matters for what comes next: dust and loose fiber under a new wrap hold heat in spots and keep the new coil from sitting tight.
Step 5: Inspect the pipe while it’s naked. Blue-discolored spots mean this section ran hotter than you think. Check welds for cracks, look for weeping at joints, and press the metal — soft or scaled-up mild steel doesn’t deserve a fresh wrap over it. The wrap is insulation, not a cast. Fix the pipe first.
Can You Reuse Exhaust Wrap?
Direct answer: sometimes — but the fact that you’re asking usually means it’s time to replace.
Reuse is legitimate in one narrow case: the wrap is genuinely young, comes off in one piece, and you need to get it off temporarily. Relocating a hanger, replacing an O2 sensor, fixing a leak at a flange — peel carefully, store it clean, and it goes back the same afternoon, tight and dry.
Here’s the line for judging the wrap itself. Run your thumb across a peeled section. If it feels flexible and the fibers hold together, it can go back on. If it’s stiff, sheds glass when you flex it, or shows brown where the sizing burned out — it’s done, and it was done before you cut it. Burned-off sizing doesn’t come back, and a brittle wrap reinstalled at the next opportune moment will just shed fiber and gap within a few heat cycles.
Two more reasons re-wrapping old material disappoints. First, a wrap that has been loose long enough has taken a set — it learned the shape of the sag, and it wants to live in that shape, not the tight spiral that does the job. Second, compression thins it out. Weeks of hot-cold cycling pack the coil down, and thinner means less insulation, so even a “clean-looking” reused wrap performs below spec from day one. The wrap fails from the inside out, and it doesn’t file a report before it goes.
For anything past its service life, replacement is the honest option. If the wrap came on long ago at a previous exhaust job, strip it and start fresh. If you are choosing new wrap rather than removing old, the exhaust wrap buying guide covers material and width.
What to start fresh with matters more than the removal itself, because a correct wrap on a clean pipe is what stops the smoke-and-smell callback. Our own line is a basalt-based weave, which holds up better than fiberglass under the sustained heat of manifolds, tow rigs, and straight-pipe runs. We can also source a glass-fiber weave for builds where the budget matters more than the heat ceiling — same weave construction, different fiber, lower cost. Either way, finish the job with stainless steel ties to lock the wrap down. Shops running their own brand can put a label on any of it; we support OEM and ODM customization on the full range.
How Long Does Exhaust Wrap Last?
There’s no expiration date stamped on the roll. Standard fiberglass wrap in street service has no fixed service interval — it lasts as long as the conditions allow, and the conditions vary wildly. Calendar age tells you little here. Two identical rolls live very different lives: one on a daily-driven sedan logging 30,000 highway miles, another on a truck idling a loading dock eight hours a day.
Three things quietly shorten its life:
- Heat soak above the range. Surface temps on street sections run 400–800°F, and nearer the headers they climb well past four figures. Sustained heat bakes out the sizing holding the fibers, and the yarn goes brittle long before it looks damaged.
- Oil contact. Engine mist or a leaky valve-cover drip turns the weave into a wick. Oil-soaked sections break down from the inside out and rarely last a full season.
- Salt and flex points. Midwest fleet trucks show it early — road salt creeps under the edges, and where the wrap touches a bracket or heat shield, vibration works the yarn thin. Run a gloved thumb along those seams before you dismiss a roll as “good for another year.”
So judge condition, not the calendar. Replace exhaust wrap when the edges crumble under your fingers, when a dark, oily patch stays damp no matter how often you wash the bay, when you can slide a finger under a band because the core has compressed, or when a worn spot shows through to blackened pipe. Any one of those means it has stopped insulating. On a well-serviced truck, expect at least one seam to need a look after 30,000 miles or so — usually caught in passing on the hoist. That is the honest answer to how long exhaust wrap lasts before replacement: until it stops doing its job, and that shows on the wrap itself, not on the odometer. Material-by-material lifespan figures — fiberglass, basalt and titanium — are in our exhaust wrap lifespan guide.
Installing New Wrap
When reinstalling, keep the wrap off the pipe before the collector and clear of oxygen sensors — the exhaust wrap installation guide covers the overlap and tie-off details.
Stripping the old layer is only half the job, and a replacement install differs from a first-time one in one important way: what the bare pipe tells you. Twenty minutes with the pipe exposed is worth more than any inspection sheet, so use it. Before the new roll goes on:
- Degrease the pipe and let it dry completely. Leftover fibers and oil film create air gaps, and air gaps cook fresh yarn from the inside.
- Address anything you uncovered — a scuffed section, a weeping flange gasket, a bent hanger tab. Wrap hides problems; it does not fix them.
- Re-check your width against the job. A 2-inch wrap on a 3-inch downpipe fails the same way twice.
Wrap at half-width overlap with firm hand tension — snug, not strangling. The full technique, band spacing, and finish work are in How to Install Exhaust Wrap: Step-by-Step Guide with 50% Overlap Technique, and if you’re re-spec’ing material or temperature rating, How to Choose the Right Exhaust Wrap: Material, Size & Application Guide covers what to order for what application.
Common Removal Mistakes
1. Pulling at the wrap while the system is still hot. This one is non-negotiable: let everything cool first. The insulation you’re stripping is exactly why the pipe can sit above 300°F for half an hour after shutdown. Hot glass fiber driven into sweaty skin doesn’t just sting — it works deeper as you keep pulling. Wait until you can hold a bare palm flat on the pipe through a count of ten.
2. Muscling it off with a pry bar or knife edge. Most turbo-back tubing has wall thickness around 1/16 inch. Every gouge becomes a crack starter once the system heats and cools a hundred times a week. The comebacks we see go like this: a smoky pinhole appears near a bracket a couple of months after a re-wrap, and tracing it back finds a tool scratch from the removal, not a wrap failure. Slice along the outer seam and unwind by hand; reach for metal tools only on seized bands.
3. Skipping the wipe-down. Fiber fuzz and road grime left on the pipe trap gaps under the new layer, and a gap the width of a dime conducts enough heat to brown fresh yarn early — which gets blamed on a bad roll. After you clean, run an open palm along the pipe; it should read as bare metal, not fabric.
For material, width and application guidance on heat wrap, see the exhaust wraps collection.
FAQ
Can you reuse exhaust wrap once it’s off?
Sometimes, but the window is narrow. Reuse only makes sense when the roll is genuinely young, the strip comes off in one piece, and you need a truck back on the road the same day. Press the peeled section between your thumb and forefinger: if it springs back, the fiber still has tension. If it powders or the edge crumbles, it is spent — re-wrapping it just schedules the next failure a few weeks out.
My new wrap is smoking after install — did I get a bad roll?
Almost never the roll. Fresh wrap carries a light binder and a trace of oil from manufacturing, and the first two or three heat cycles burn it off — a thin haze and a hot, slightly acrid smell are normal. Run a normal warm-up and cool-down twice and it fades. What is not normal: smoke that keeps coming after several cycles, or smoke from one localised spot, which usually means oil or coolant is soaking into the wrap from above.
Do I have to strip all the old wrap, or can I wrap over it?
Strip it. Old wrap leaves fiber dust, road grime and cured resin on the pipe, and anything trapped under the new layer becomes a gap — and a small gap is enough to brown fresh yarn early and get the roll blamed. The old material has also lost its tension, so a second layer over it loosens faster than one fresh pass. Peel down to bare metal, then wipe until an open palm reads metal, not fabric.
Will wrap make the pipe underneath rot?
Not if it is wrapped correctly. A tight wrap with consistent overlap keeps moisture out, and the pipe runs hot enough to dry itself. The problem is a loose or torn wrap: glass fiber behaves like a sponge, holds water against the steel, and the first rust shows up at the seams and under the ties. Trapped moisture rots pipe — the wrap alone does not.
How often should our fleet actually look at wrapped sections?
Signals beat schedules. Next time a truck is on the lift, spend one minute: press a wrap edge between your thumb and forefinger. If it powders, plan the replacement now; if it springs back, the roll has life left the odometer can’t tell you. That one pinch predicts failure better than any date logged in a shop system. When it is time to re-wrap, our Exhaust Heat Wrap Kit ships in the widths and footage that fit header, downpipe, and turbo-back sections, in quantities for single bays and full fleets.
Need a quote? Send us your part number. We’ll reply within 24 hours with pricing, MOQ, and delivery options.